
What to Expect on Installation Day

On countertop installation day, a crew arrives with your finished pieces, removes the old tops if needed, levels the cabinets, sets and seams the stone, mounts the sink and caulks the joints. For a typical kitchen it all happens in a single day, usually a few hours of work. Your job is mostly preparation and a careful walkthrough at the end.
This guide is a homeowner's view of the day: what to do the night before, what the crew does and in what order, what it sounds and feels like, and what to check before anyone leaves. The full project, from consultation to care, is in our quartz countertop installation guide.
How to Prepare for Countertop Installation
A Few Days Before
- Confirm who disconnects the sink, dishwasher and cooktop. Gas and hardwired cooktops need a licensed professional.
- Arrange access: gate codes, parking and, in a condo, the freight elevator and loading dock.
- Plan meals and dishwashing for a day without a sink.
The Night Before
- Clear everything off the countertops and out of the upper drawers.
- Empty the sink cabinet completely.
- Take down anything fragile on nearby walls and shelves.
- Move rugs and furniture out of the path from the door to the kitchen.
- Have the new sink and faucet on hand if they are not already with the fabricator.
Countertop Installation Day, Step by Step
Every crew has its own rhythm, but the order of work is broadly the same across the industry.
1. Arrival and Protection
The crew walks the path from the truck to the kitchen, lays down floor protection and covers nearby cabinets and appliances. At Griffin Quartz, a crew of two to four installers typically handles a kitchen.
2. Removing the Old Countertops
If you are replacing existing tops, they come out first. This is the loudest, dustiest part of the day, especially with tile. Our guide to countertop removal and replacement explains how each material comes out.
3. Checking and Leveling the Cabinets
With the cabinets bare, the installers check them for level and fill gaps with shims so the stone rests evenly. Caesarstone's installation guidance for fabricators calls for shimming to level the surface and filling voids to avoid vibration.
4. Dry Fit
Each piece is carried in, set in place and checked against the walls, appliances and the other pieces. Small adjustments happen here.
5. Setting, Seaming and the Sink
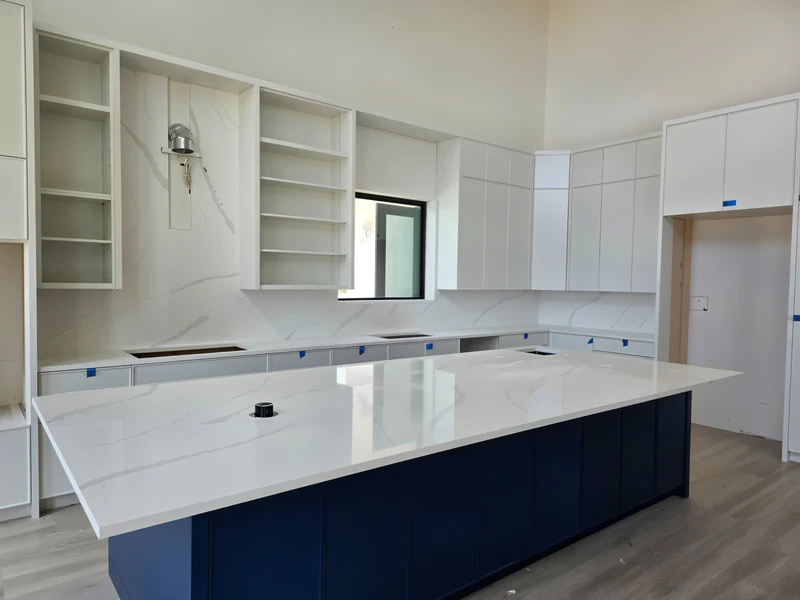
The pieces are bonded to the cabinets, typically with silicone. Seams are pulled tight with seam setters and filled with color-matched adhesive. An undermount sink is attached to the underside of the stone with clips or brackets. See quartz countertop seams for what a good joint looks like.
6. Backsplash, Caulk and Cleanup
Any quartz backsplash pieces go on, the joints at the wall and sink are caulked and the surfaces are cleaned.
Noise, Dust and On-Site Cutting
Expect noise during removal and some drilling while cabinets are adjusted. Most cutting happens in the fabrication shop before the pieces arrive, so the quartz itself usually arrives ready to set.
When a cut is needed on site, it should be done with dust controls. Cutting quartz produces respirable crystalline silica, and OSHA says employers whose workers install countertops must follow its silica rules, which include controls such as water at the blade. Caesarstone's guidance for fabricators says to wear a mask and goggles and to cut quartz only outdoors. Keep children and pets away from the work area for the whole day.
Do You Need to Be Home for Countertop Installation?
Yes. Plan for an adult to be home from arrival to walkthrough. The crew may need your decision on details like final sink position or where a small gap should be caulked, and you will want to be there for the inspection. Some condo buildings also require a resident to be present to let the crew in.
Countertop Installation Checklist: The Final Walkthrough
Before the crew leaves, walk the kitchen with the lead installer and check:
- Surface: no chips, scratches or cracks, especially at corners and around cutouts
- Seams: tight, flush and a close color match
- Level: place a marble or a level on the counter if you want to be sure
- Overhangs: even along the front and at seating
- Sink: centered where you approved, with an even reveal
- Faucet holes and cooktop opening: in the agreed positions
- Caulk lines: neat and continuous at the wall and sink
- Cabinets and floors: no new damage from the day
Point out anything you notice while the crew is still there. It is much easier to address on the spot.
After Installation: The First 24 Hours
- Leave the sink alone. Silicone commonly needs about 24 hours to cure. Do not use the sink or reconnect plumbing until your installer says it is ready.
- Go easy on seams. No heavy weight, standing or sitting on the counter.
- Hold off on cleaners. Wipe with water until the caulk has cured, then clean with mild soap. See how to clean quartz countertops.
- Register your warranty. Quartz warranties come from the manufacturer, and many brands ask you to register. Check the terms for your brand, for example on our Caesarstone brand page.
Installation Day in South Florida
Two local factors come up often. First, condo buildings in cities like Hollywood and along the beaches set work hours and elevator reservations, so the start time may be fixed by the building rather than the crew. Second, summer storms and hurricane season, June 1 to November 30, can push an installation date. If a storm is coming, expect a call to reschedule rather than a crew on the road.
For typical timelines around the day itself, see how long countertop installation takes. For a starting price, try our quote calculator or visit our quartz countertops page.
Frequently Asked Questions
What happens on countertop installation day?
The crew protects your floors, removes any old countertops, levels the cabinets, dry fits and sets the new pieces, joins the seams, mounts the sink, installs backsplash pieces, caulks the joints and cleans up. You finish with a walkthrough.
How long does countertop installation take on the day?
For a typical kitchen, installation is usually done in a single day, often about four to eight hours including removal of the old tops. Vanities are much quicker, and large kitchens with waterfalls or full-height backsplashes can take longer.
Do I need to be home for countertop installation?
Yes. An adult should be home from arrival to the final walkthrough to answer questions, approve details like sink position and inspect the finished work. Some condo buildings also require a resident to be present.
How should I prepare for countertop installation?
Clear the countertops and upper drawers, empty the sink cabinet, remove fragile items nearby, clear a path from the door to the kitchen, arrange plumbing and cooktop disconnects and confirm access and parking.
When can I use my countertops after installation?
You can use the surface for light tasks right away. Silicone commonly needs about 24 hours to cure, so wait before using the sink, reconnecting plumbing or putting weight near seams, and follow your installer's instructions.
Ready to Plan Your Installation?
Book a free in-home estimate and we will walk you through your installation day, from access and parking to plumbing and the final walkthrough. We serve Palm Beach, Broward and Miami-Dade counties. Call (720) 324-1436 or request an estimate online.
Request a Free Estimate